Note: For the 2023/24 season all our competitions will be held at Frodsham Community Centre and will feature both PDI and Print competitions.
As a result, the image size required has reverted to 1600×1200 as this matches the projected resolution.
To display your image to it’s best it’s important that it complies with the competition requirements, mainly the size and colour space.
At present our projected images need to be a maximum of 1600 pixels wide and a maximum of 1200 pixels high.
As a result a landscape format image will fill the screen horizontally at 1600 pixels wide, whereas a portrait (or square) format image will be 1200 high but will not fill the available width,
NOTE It is not necessary to add a background to your image in order to fill the entire space. When viewed the unused area will be filled with black. It’s a good idea to add a small (1 or 2 pixel) black or white border to PDI’s to make clear where the edge of your image lies.
Depending on the software you use there are different ways to reduce your image to this size. Instructions follow covering the most popular options but most image editing software will work in a similar way.
Updated for the 2023/24 season 6/9/23
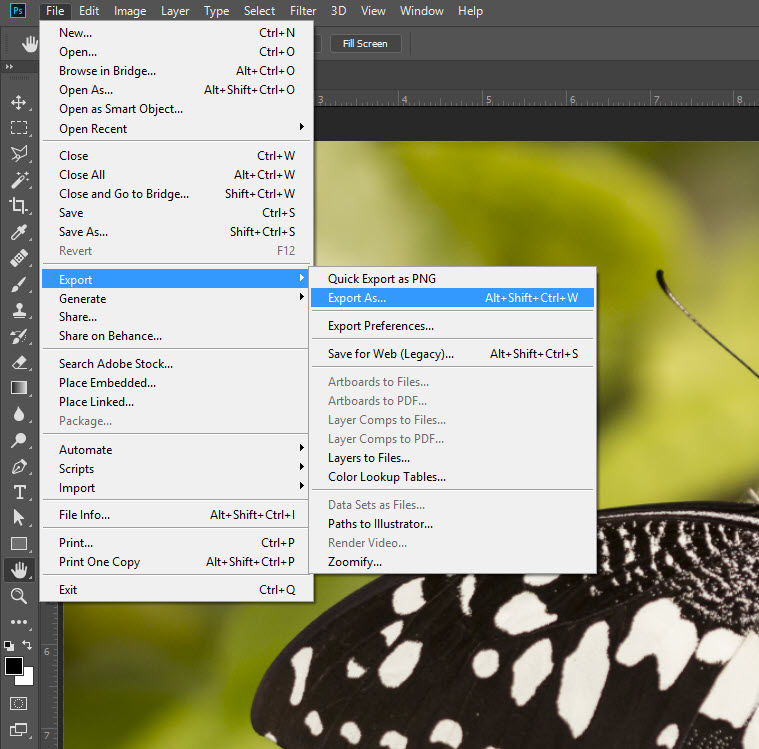
Photoshop CC
From the File Menu choose Export > Export As
In the dialog box select JPG as the format. For a Landscape format image set the WIDTH to 1600 px (leave the height alone).
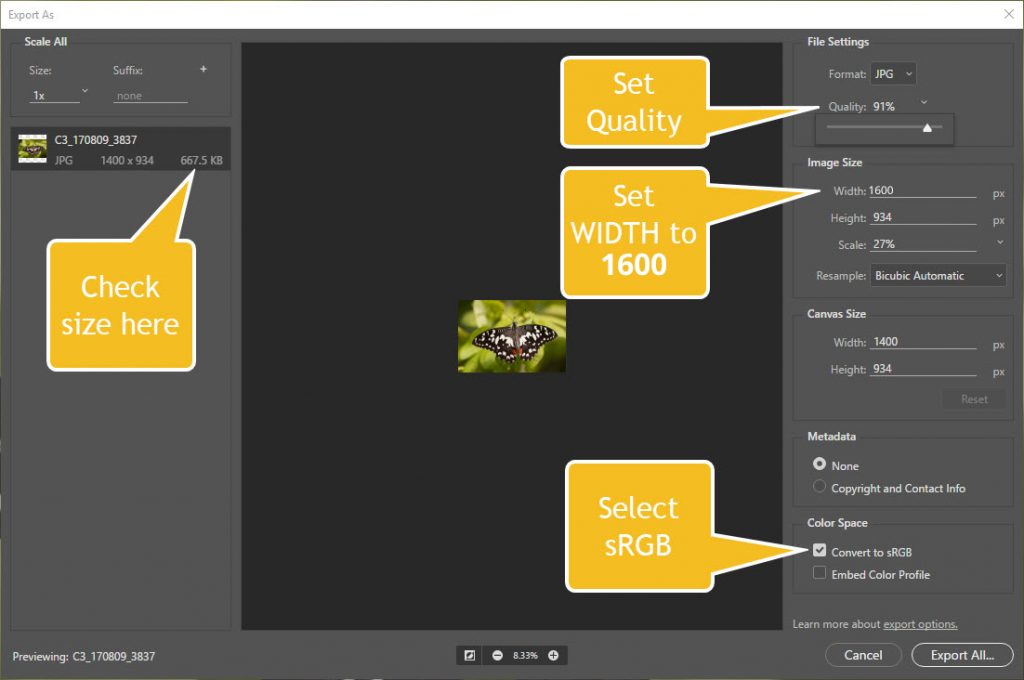
For a Portrait (or Square) image set the HEIGHT to 1200 px (leave the width alone).
Set the quality slider to between 80 and 100 and check the file size on the left side. Anything up to 1 Mb will be fine. Make sure you tick the box ‘Convert to sRGB’, Save the file using the competition standard filename of the image title.
NOTE Do NOT include punctuation marks or special characters in your filenames.
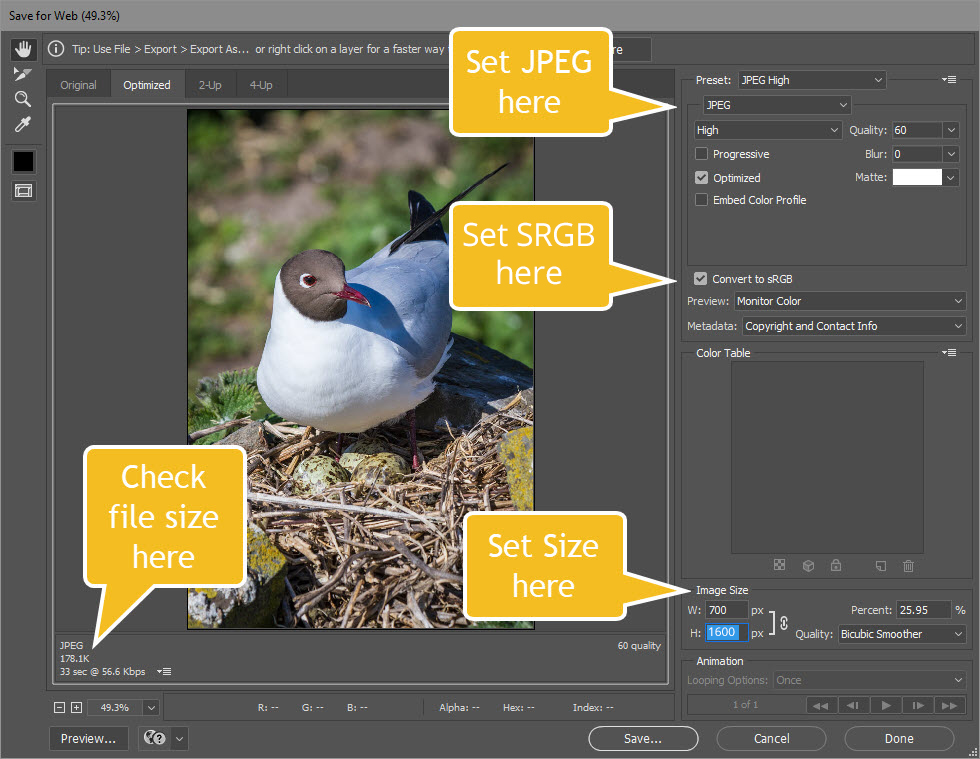
Photoshop (earlier versions)
In older versions select File > Save for Web. This brings up a different dialog box but the settings need to be the same.
Lightroom (Classic, Version 6 and earlier)
In Lightroom the simplest way to produce your competition files is to make an Export Preset. Select File > Export. In the dialog box set the following fields.
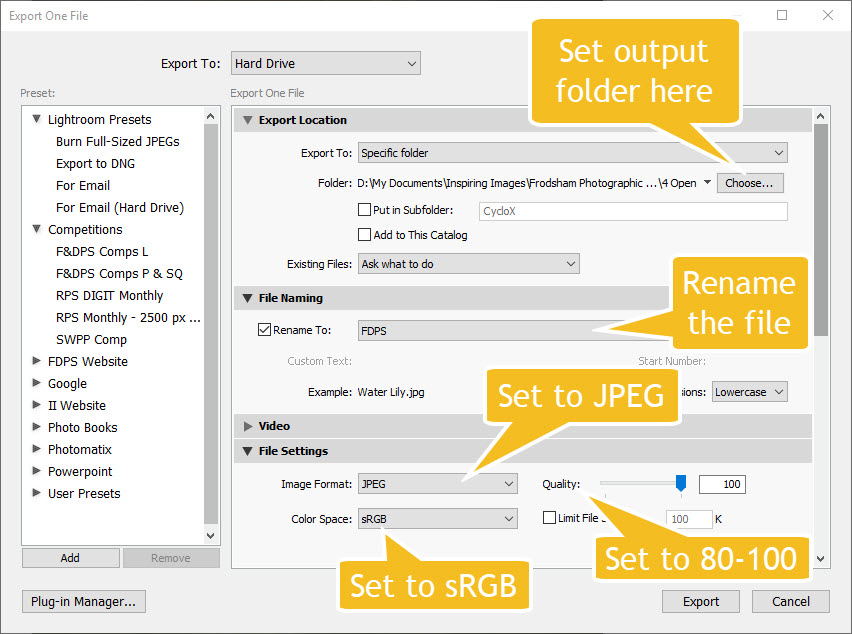
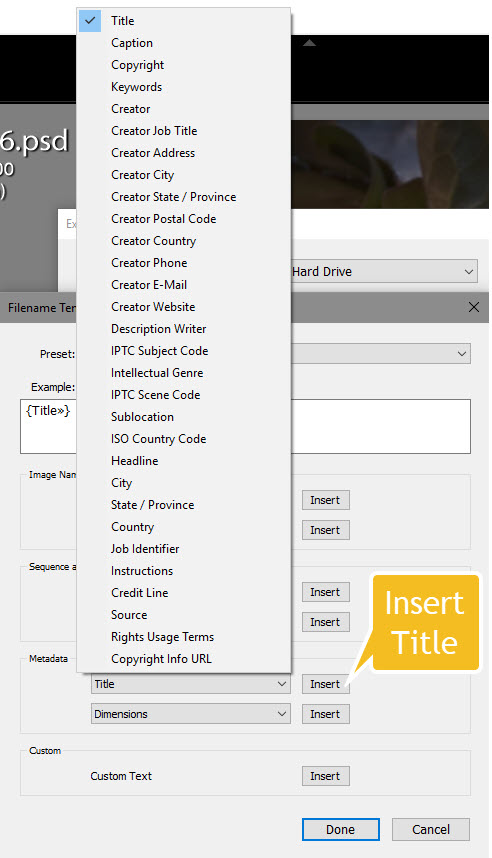
I use a preset ‘FDPS’ to set the filename to the Title. You can just type in the new file name but I find this saves time. To set up the renaming preset tick the ‘Rename’ box and select ‘Custom Settings’ from the drop-down list. In the dialog box under ‘Metadata’ select ‘Title’ from the list and click ‘Insert’. Click ‘Done’.
Click on the ‘Preset’ field and select ‘Save Current Settings As New Preset’ and give it a name. As long as you fill in the ‘Title’ field in the image’s Metadata field before you export the file, the exported file will have the correct format filename.
Select JPEG for the Image Format and sRGB for the Colour Space.
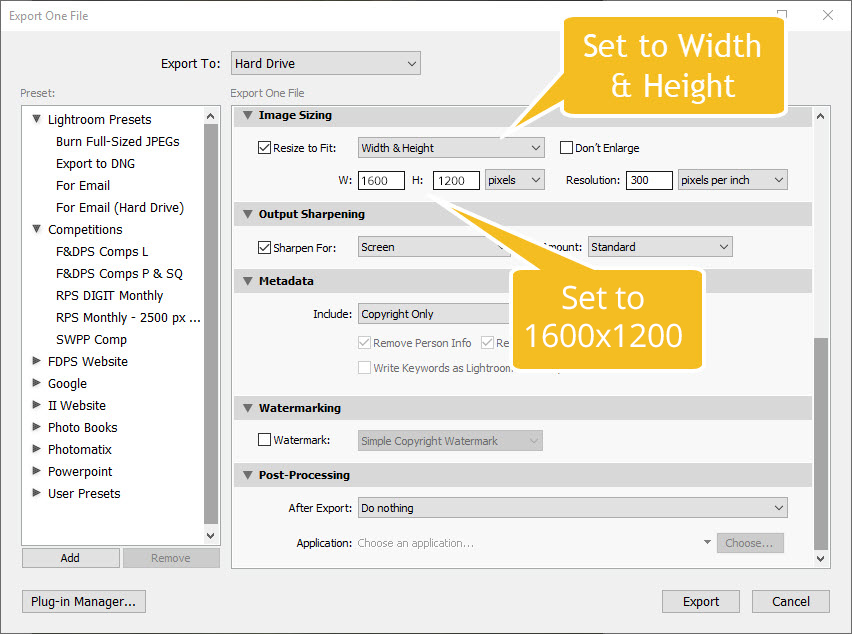
Scrolling down click the ‘Resize to Fit’ box and the drop down to ‘Height & Width’. This sets the maximum dimensions of the file and works for Portrait or Landscape files.
Save the preset by clicking the Add button (bottom Left) and giving the preset a name. It seems like a lot of work to set this up but to use it all you do is make sure the image’s Title is set then select File > Export with Preset. Choose where you want to save the file and it’s done. If you select all the 4 files at once it will export all of them.
NOTE:
- I have written these notes using the software I have. Photoshop Elements may well differ slightly compared with Photoshop but you should find enough detail here to work it out. If anyone wants to produce a guide for Elements please let me know by emailing webmaster@frodsham.photos
- If you find any errors or require further clarification again let me know.
Thanks
Andrew Williams
Updated 6/9/23